Lightweight Rear Pannier Rack
Scroll down to skip the blah-blah and go right to the photos
Click Here for a folder of photos taken after chrome-plating!The request was for a minimalist, lightweight rear rack for small panniers, and to keep an
English-style saddle bag (hanging from the saddle) from resting on the fender (mudguard).
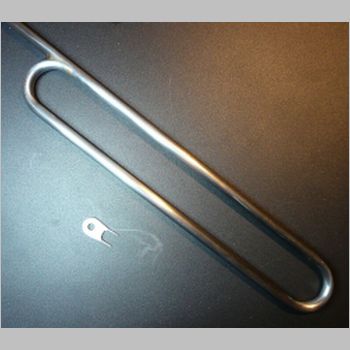
The top platform is barely wider than the fender, and just long enough for the panniers.
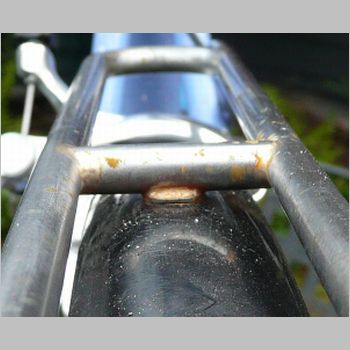
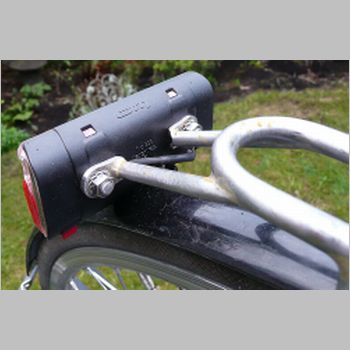
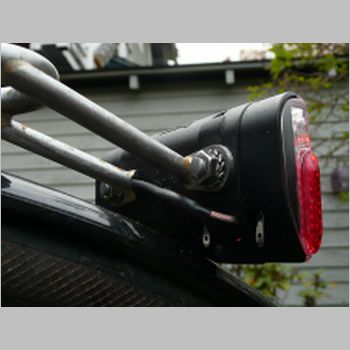
Another requirement was an attachment for a Busch & Müller "Toplight Line Plus" LED tail
light, a remarkably bright light considering it's powered by the front hub dynamo (SON),
with the juice that's left over after the headlight (Schmidt eDelux) takes its share.
(Two holes 50mm apart is becoming a popular tail light attachment standard, so we can
also use other brands of lights when this one becomes obsolete.) Internal cable routing
inside the rack is a must of course, because it's more practical... OK, because it's cool.
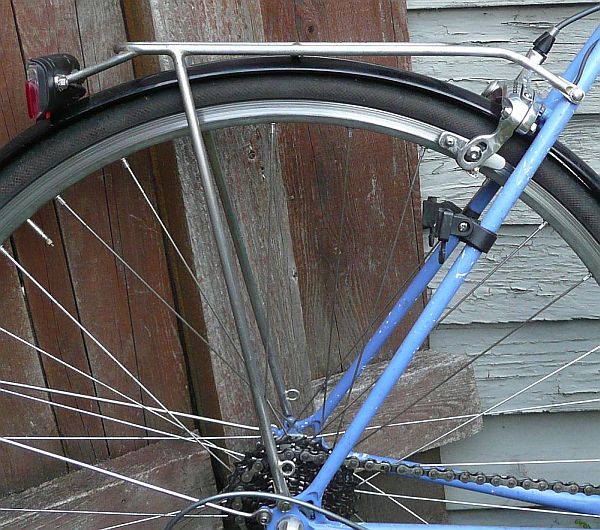
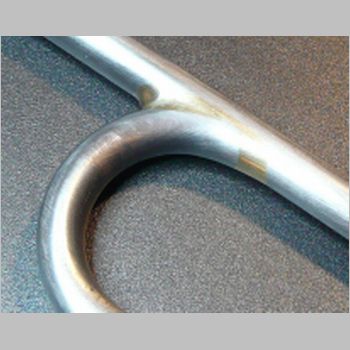
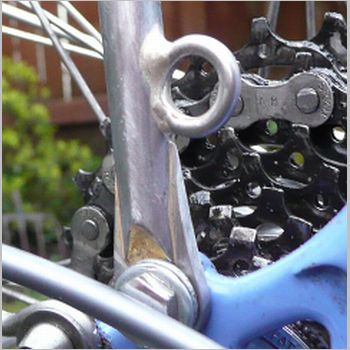
Because the rear brake (a sidepull) has its cable-actuation arms on the left, tending
to block a forward strut to the left seatstay, I decided to make this rack asymmetrical,
with only one forward strut, on the right. With only one strut per side going from the
platform down to the dropouts, the seatstay strut is needed to help carry the weight.
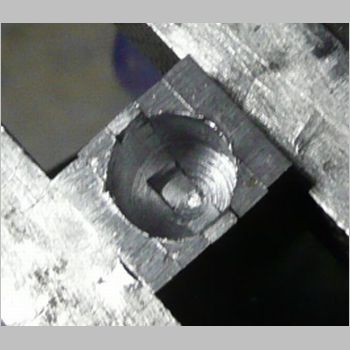
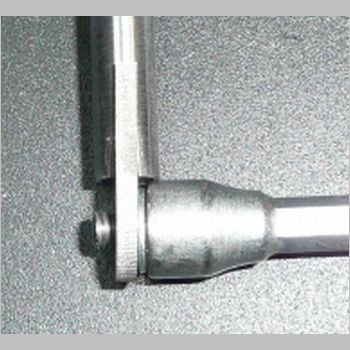
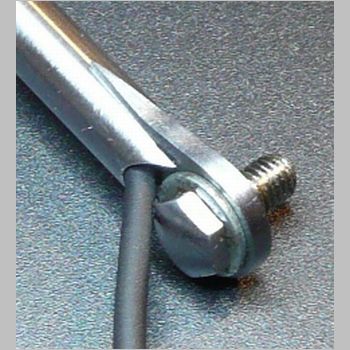
The rack attachment tabs are Alex Wetmore's waterjet-cut jobbies, a huge time-saver over
making them all myself. As you can see in the photos, I stack up 5 tabs in the vise, and
drill down @ 5/16" to 'mill' the center one of the 5 to receive the rack strut tubes. Then
I remove the center tab and put the next one in (pre-slotted close to the final shape), and
repeat the process two more times, to mill the three tabs this rack needs. The outer four tabs
are sorta "sacrificial" and are just there so the drill doesn't wander, catch or tear the tab.
(I can still use those four tabs on some future project though, they aren't ruined.)
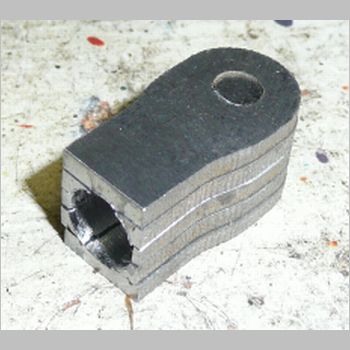
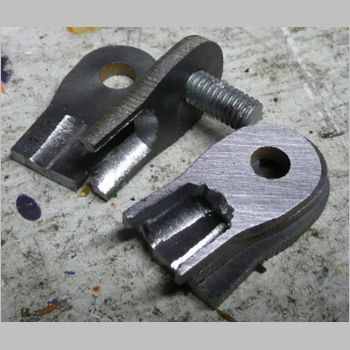
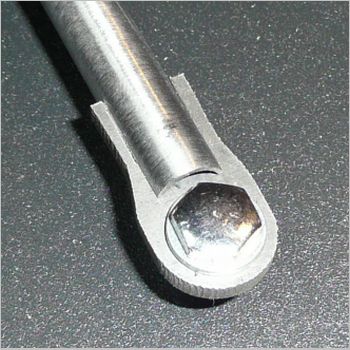
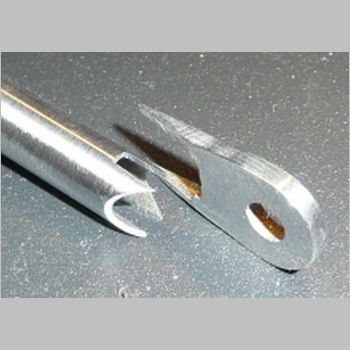
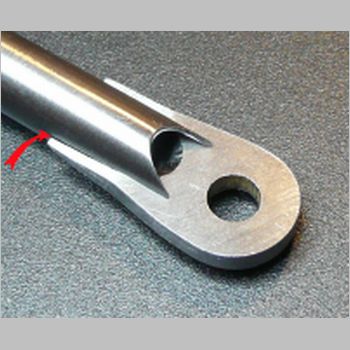
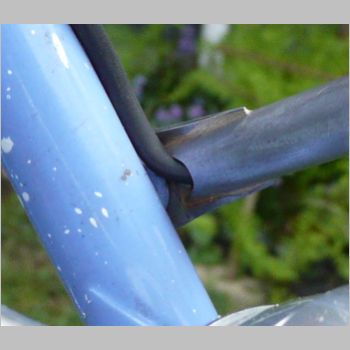
The tube is also slotted, a little, though after it's assembled it looks like the slot in the
tube is extra-deep. The slots in the tab and in the tube hold each other in a way that's
easy to braze, light weight, strong, and kinda nice-looking, if I do have to say it myself...
The resulting look is like a miniature version of a classic Track front fork tip. I have
done track ends (front and rear) just like this — but you can't drill them with a hand drill,
it requires a milling machine. Remind me to show you the pix of the track ends Alex W.
milled for me, they're around here somewhere... Very nice. Alex is a good guy to know!
I'm making this without a lathe, milling machine or jig; I don't even have a drill-press
or a belt-sander. Just a center-punch and hammer, hand drill, vise, hacksaw, a few files,
'shop roll' utility abrasive cloth strip, a small tubing bender, and an oxy-acetylene torch.
Oh in case you can't tell, it hasn't been painted yet. So it will rust, 'til we get it painted or
chrome plated — we haven't decided yet what to do about that. For now, she's testing it.
Click on any of the photos below to see it larger.
...and also some more explanations, on most of the photos.
|
|
|
|
|
|
|
|
|
|
|
|
|
|
|